
“Is there any way to delete photos/videos from my iPhone without deleting them from my iCloud? I'm trying to free up device space without losing the pictures/videos on the cloud.”
When you enable iCloud Photos on your iPhone, your photos automatically sync to iCloud. This also means that if you delete a photo from your iPhone, it gets deleted from iCloud too.
What if you want to delete photos from your iPhone but keep them in iCloud? Fortunately, there are a few ways to do that. In this article, we'll share 5 methods to remove photos from your iPhone without deleting them in iCloud.
iCloud Photos is designed to sync your photos and videos across all Apple devices using the same Apple ID, and it updates any changes automatically. So if you delete a photo on your iPhone with iCloud Photos turned on, it will also be deleted from iCloud and all connected devices. This can be frustrating if you just want to free up space on your iPhone without losing your photos in iCloud.
The good news is, there are ways to delete photos from your iPhone without affecting iCloud. Another option is to back up your photos using third-party tools before deleting them, so you can keep your memories safe.
Some of the tips below will show you how to delete photos from your iPhone without removing them from iCloud, while others offer alternative ways to back up your photos. Keep reading to learn more.
If you want to delete photos from your iPhone but keep them in iCloud, one of the simplest solutions is to turn off iCloud Photos. This stops your iPhone from syncing with iCloud, so any photos you delete will only be removed from your device—not from the cloud. Here’s how:
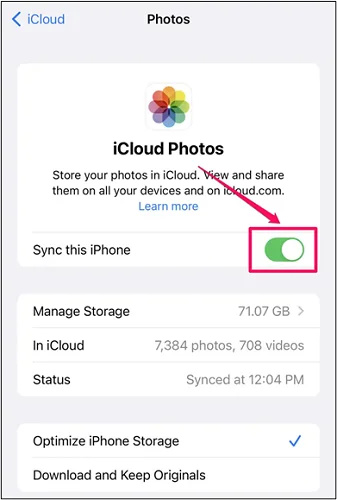
If Optimize iPhone Storage is on, your iPhone will ask if you want to keep a copy of your iCloud photos. You can choose Remove from iPhone or Download Photos & Videos. Either way, your photos will stay safe in iCloud.
However, keep in mind that this method has a limitation: if you turn iCloud Photos back on later, any photos you deleted from your iPhone will also be deleted from iCloud.
In fact, not all cloud services sync like iCloud. If you use Google Photos, Google Drive, or Dropbox to back up your iPhone photos, the uploaded photos will stay in the cloud even after you delete them from your iPhone. So, if you want to free up space on your iPhone without losing your photos, try using one of these cloud storage options instead.
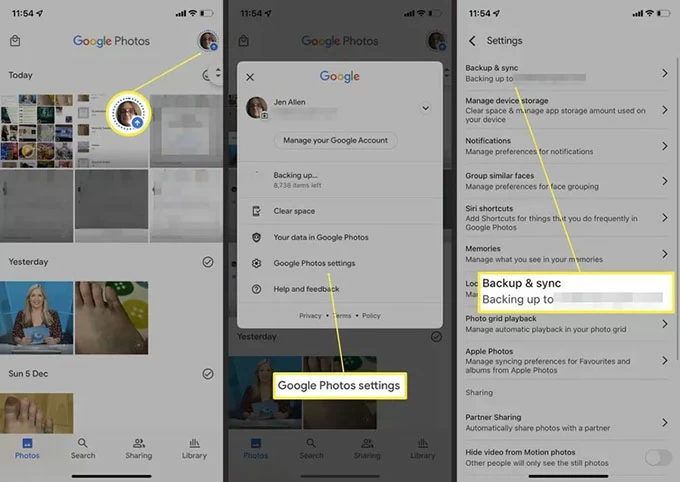
The backup may take some time, depending on how many photos and videos you have. Once it's done, you can delete any photo from your iPhone. Your backed-up photos will still be available in the Google Photos app and on the web, but deleting them from your iPhone won’t remove them from Google Photos.
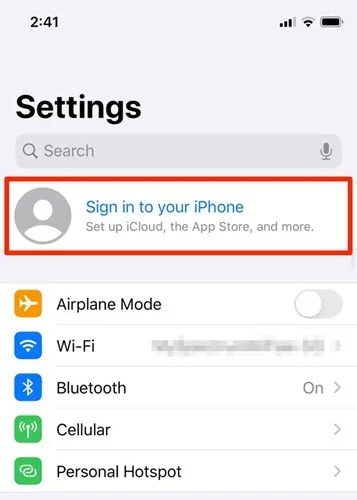
If you have more than one iCloud account, you can log in with a second iCloud account and sync the photos with this new account. This way, after you delete the photos from the iPhone, the photos in the old iCloud account will remain unchanged. Here's how to log in with another iCloud account:
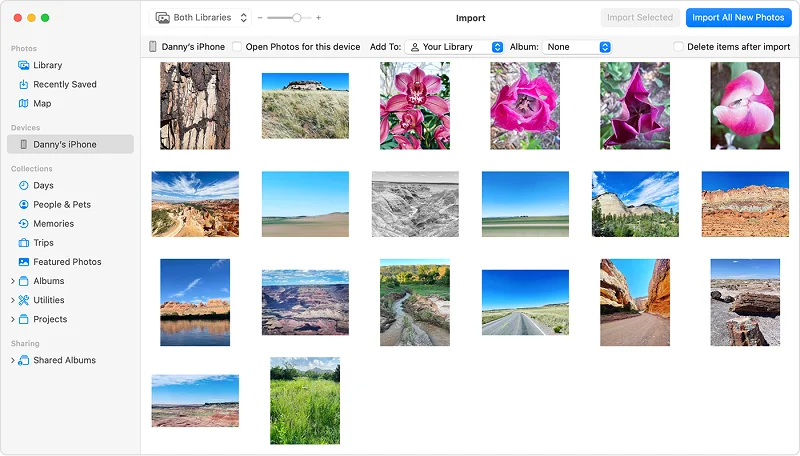
If you want to delete some photos from your iPhone but keep them safe, you can export them to your computer. Using the Photos app and a USB cable, you can easily transfer your photos and videos to your Mac.
If you want to back up your iPhone photos to a computer, we recommend using a trusted tool like FoneGeek iOS Data Backup & Restore. This tool lets you back up photos, messages, videos, music, and over 20 types of files to your PC with just one click. You can easily export your iPhone photos and manage multiple iOS files in one place.
Here are some key features that make this tool a great choice:


To create a complete backup of all the photos and data on your iPhone, follow these simple steps below:
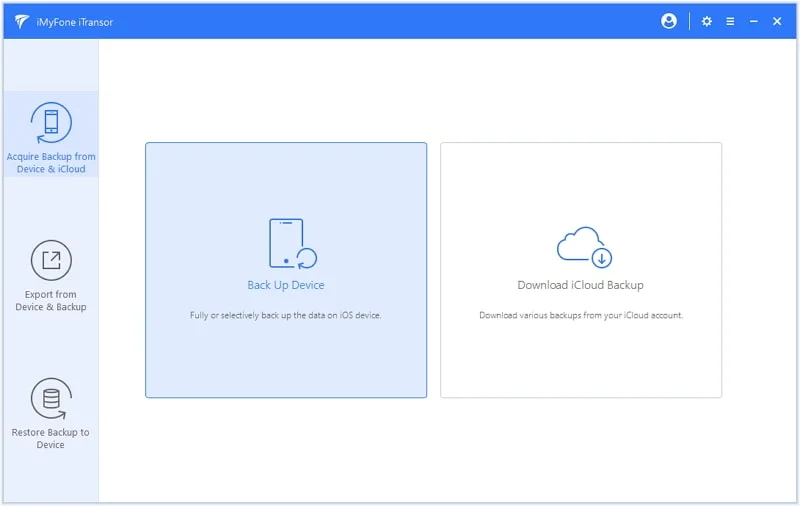
Step 1: Download and install the iPhone Photo Backup tool on your computer. Open it and click on Backup & Restore from the home screen.
Step 2: Click Backup, then connect your iPhone to the computer using a USB cable. The program will automatically detect your device.
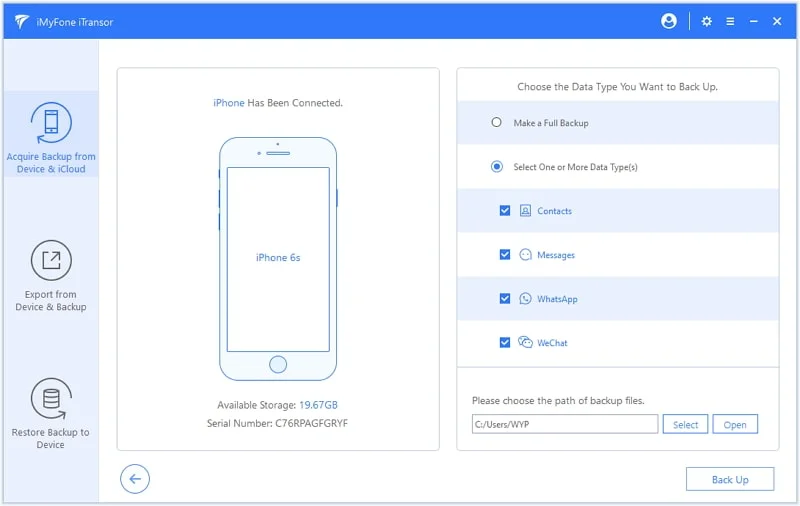
Step 3: Select Photos and any other data types you want to back up, then click Backup. Keep your iPhone connected until the process finishes.
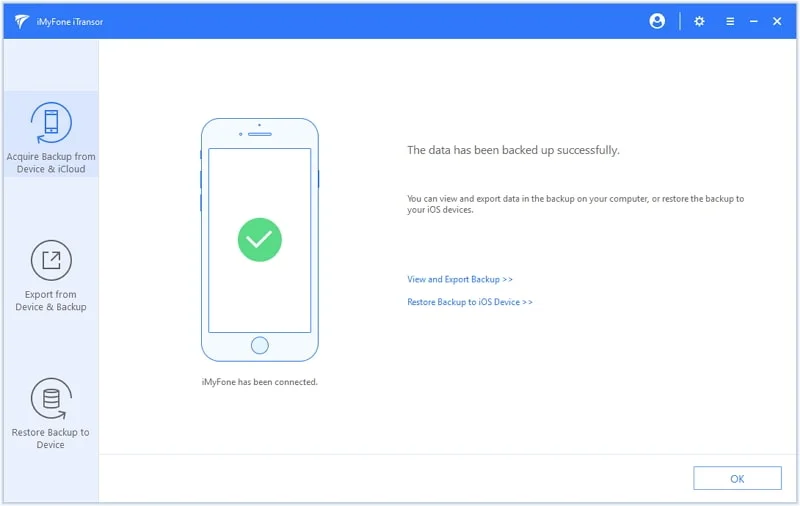
Once the backup is complete, you can view your photos on the computer. Now it's safe to delete them from your iPhone to free up space.
You can’t delete all photos from your iPhone with one tap, but there’s a quick way to select and remove them. Just open the Photos app, go to All Photos, tap Select, then swipe across the photos and drag your finger up to select everything. When you’ve highlighted all the photos, tap the Trash icon to delete them.
When you delete photos from your iPhone, they’re moved to the Recently Deleted album, where they stay for 30 days before being permanently deleted. During this time, you can recover them if needed.
However, if iCloud Photos is turned on, deleting photos on your iPhone will also delete them from iCloud and all other Apple devices using the same Apple ID.
Deleting photos from the Photos app doesn’t remove them permanently right away - they're moved to the Recently Deleted album, where they stay for 30 days before being erased automatically.
To permanently delete photos, go to the Photos app, tap Albums, then select Recently Deleted. Use Face ID or Touch ID to unlock it, and tap Delete All to remove the photos for good.
To check if your photos have been fully backed up to iCloud, open the Photos app on your iPhone and see if the upload process has finished. You can also visit iCloud.com and log in with your Apple ID to verify that your photos are stored in the cloud. If everything is backed up, you'll be able to view all your photos there.
Absolutely. Just sign in to iCloud.com with your Apple ID, and you’ll be able to view, download, delete, and organize all the photos stored in your iCloud account right from your web browser.
In short, the only direct way to delete photos from your iPhone without removing them from iCloud is to turn off iCloud Photos. Alternatively, you can back up your photos to a computer, a different cloud service, or another iCloud account. This way, you can safely delete photos from your iPhone to free up space without losing them.
By the way, if you mistakenly deleted important photos on your iPhone and there is no backup available, don't panic. You can rely on FoneGeek iPhone Data Recovery to get them back. This powerful tool can directly scan your device and help you recover deleted photos from iPhone/iPad with or without backup.
As a professional writer who is interested in technology, Edwin J. Parke has helped thousands of users by offering various tips to solve their problems.
Your email address will not be published. Required fields are marked *


Copyright © 2025 FoneGeek Software Co., Ltd. All Rights Reserved


 English